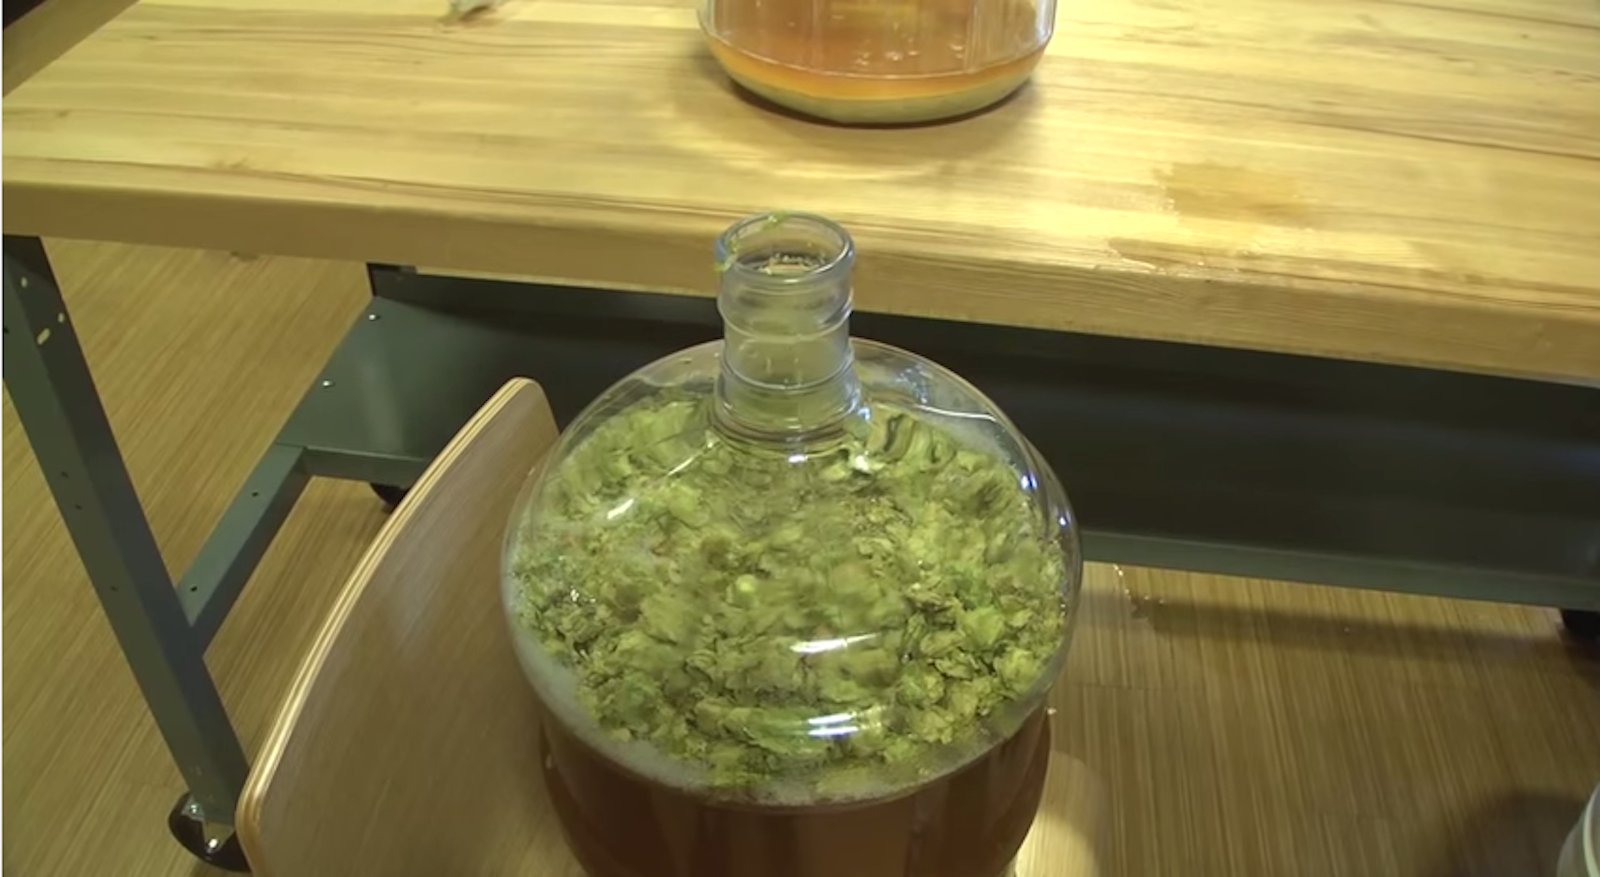
Hops that are steeped in beer between fermentation and packaging are called dry hops, although they do actually get wet in the process. A term such as conditioning hops or secondary hops might be more descriptive, but we continue to describe them as dry for the same reason that we continue to call a 1½" x 3½" piece of lumber a 2-by-4: It’s tradition.
Dry hopping your homebrew is an excellent way to introduce fresh hops aroma to any style, but pale ales and IPAs are especially associated with the technique. Whether you dry hop with whole leaf or pellet hops is up to you: Leaf hops will tend to float on top of the liquid, while pellet hops will disintegrate into a hops sludge that sinks to the bottom. More than anything, your choice may come down to what’s available.
Here are three common ways to deliver dry-hopped goodness to your homebrew.
1. Dry hop in secondary (loose)
Dry hopping in secondary with loose hops is probably the most commonly employed method. After fermentation is complete, as indicated by a stable final gravity reading, rack your beer to a carboy, but don’t add the dry hops just yet. Think about how long you’d like to condition the beer in secondary and estimate the day that you’ll keg or bottle the batch. Then plan to add the dry hops about 5 to 7 days before that. The total amount of time the dry hops remain in contact with the beer is up to you, but there’s little to no benefit from dry hopping for longer than a week.
When you’re ready to add the dry hops, simply open up the carboy and dump them in. No need to sanitize them, as hops are a natural preservative and have antimicrobial properties. The alcohol in your finished beer will also help keep bugs at bay.
2. Dry hop in secondary (contained)
This method is just like the first one, but rather than let the hops swim freely in the beer, you use some method of containment. This makes cleanup easier, and it helps keep hops matter out of the siphon when it’s time to transfer your beer for packaging.
Nylon mesh bags work well, but avoid using them with a standard glass carboy: It’ll be difficult to get the hops back out after they’ve absorbed liquid. Plastic carboys such as Better Bottles have wider necks and can accommodate hops bags more readily. If you prefer traditional glass carboys, some retailers sell long, narrow stainless steel mesh tubes that slide through the neck and down into the vessel. Be sure to sanitize the mesh bag or mesh tube before adding the hops.
3. Dry hop in primary
If I’m pressed for time, I’ll often dry hop right in the primary fermentor, especially if I’ve used a highly flocculent yeast strain that forms a firm cake on the bottom. I ferment in plastic buckets, which makes dry hopping in a mesh bag a breeze. Then it’s just a matter of removing the bag on bottling day and taking care not to suck up too much yeast with the siphon. Doing everything in primary also avoids potential oxidation that could occur with racking to secondary.
Ultimately, dry hopping is about getting hops in contact with your fermented beer. The details of how you make that happen are less important, so choose the method that’s most convenient for your process and preferences. Happy hopping!

