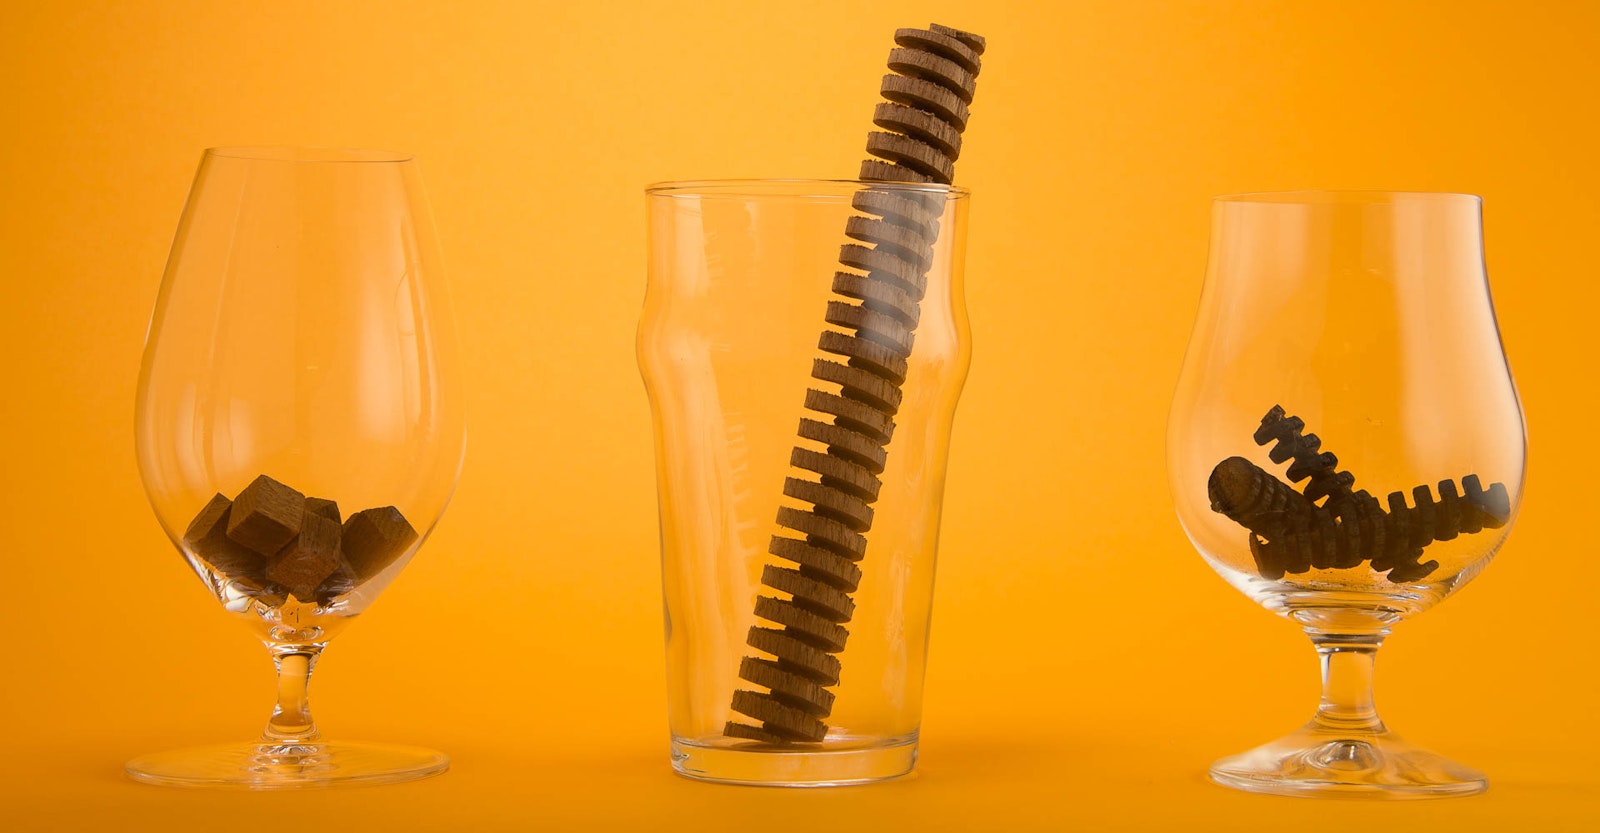
Barrel-aged beers are so trendy that nearly every taphouse and beer store has a section of them. It may be fashionable, but brewers are capitalizing on what vintners and distillers already know: wood aging can mellow some harsh edges as well as add structure and complexity. A barrel brings three components together to transform a beer. The first is whatever was in the barrel before, such as bourbon, rum, or wine. The oaken staves soak up flavors that diffuse into the beer. The second element is the wood itself. Woodiness, tannins, and vanilla are most common, but you can often taste coconut and caramel notes as well. The final factor is oxygen, because barrels breathe. The wood allows for a slow injection of oxygen that ideally skews the flavors toward sherry, toffee, and nuts.
Commercial brewers aren’t the only ones taking advantage. Homebrew clubs may chip in on a barrel and blend a dozen or so 5-gallon (18.9 l) batches to fill it. It’s also relatively easy to find smaller, individually sized barrels, although they’re not cheap. In either case, adding a barrel to your home brewery is not so simple. Above and beyond the starting costs and possible wait list, maintenance and storage require a fair amount of effort. Over time, bacterial infection can also become an issue, which is not so pleasant for that imperial stout you wanted to age.
But let’s say you’re not ready to drop $150 to speculate on a 5-gallon (18.9 l) barrel or you don’t want to worry about keeping one clean and operational. You can still capture some of that barrel magic in your own beer bottles by using oak in your fermentor or keg. You won’t get the oxidation piece, but your beer will still benefit from the other aspects of wood aging.
Wood You Rather?
You have several choices for what form of oak to use. Oak chips and cubes are easy to find, but larger pieces such as spirals, honeycombs, and stave sections are also available. Each has its proponents and detractors. Oak chips have the largest surface area relative to their depth, so they can emphasize a simpler kind of woodiness and tannins. I prefer oak cubes for the depth of character they provide, especially for evoking coconut and vanilla, but you should experiment to determine what works best for you.
Aside from the physical form, toasting is another factor. All these forms of wood generally come with some degree of toasting to impart a similar effect to oak barrels, which are charred inside. In general, a light to medium char works best, especially on your first outing.
Beer Selection
It used to be that only heavy-duty beers such as imperial stouts and barleywines would be oaked, but just about any style of beer can work. That said, your first foray should be something big and roasty because the beer will have enough character to stand up to the wood, and it will be more forgiving if you overdo it a little. I’d recommend a strong stout or porter. Go ahead and brew it following your normal process. We’ll add the wood once the fermentation is done.
Handling
You’ve chosen the wood and primary fermentation is almost done; now, it’s go time. There are many variations, but here’s an easy guide to getting barrel character from your oak. For simplicity’s sake I’ll assume we’re using cubes, but these steps apply to any form you chose.
Wood is particularly hard to sanitize. Chemicals such as StarSan or Iodophor are a bad idea because they’ll soak into the wood. Heat is the best alternative. Boil 2–4 ounces (57–113 g) of oak cubes for 5 minutes or so and then discard the water. This will get rid of some excess tannins, too. Use less wood if you’re using chips—about 1–2 ounces (28–57 g) should do the trick.
- Pick your flavoring agent—bourbon, rum, cognac, sherry—to base your faux barrel on. Place the cubes in a mason jar and add enough of the flavoring agent to cover the cubes. Seal the jar and let them soak for a few days.
- Discard the liquid from the jar and then cover the cubes with your flavoring agent again. Let them sit for a week. The first round can be rough (taste it and see), but we’ll save the second round to add to the beer.
- Rack the beer into secondary and add the cubes (reserve the liquid in the jar for now). If you decide to use a keg, a cheesecloth bag that contains a few sterilized marbles is a good way to make oak chips or cubes easier to remove.
- Let the beer age with the wood. Use your palate to decide how long. Oak chips are pretty quick; a week or so can be plenty. For oak cubes, a month or two is good, and longer can be better.
- After you think enough time has passed (be conservative on your first try), pull a sample and see how the beer tastes. If the wood character is overwhelming, the batch will need more time to age and soften. You’ll probably want to use less wood next time, too. If the wood character is right, but you’d like more of that bourbon or sherry character, stir in some of the liquid you saved before you bottle or keg.
Like any other aspect of brewing, wood aging takes experience to find the right balance, but if your base beer has a strong character and you’re conservative about the amount of oak used and contact time, it will work out. Use each successive experiment to fine tune the process, and then you can get more creative. Oak-aged pilsner, anyone?

