In part 1 and part 2 of this series, we looked at the honey and the process of mead making, respectively. Here we cover fermentation, aging, bottling, and potential problems you could encounter in your early mead-making adventures.
Fermentation
Unlike with most beers, during mead fermentation, you still have work to do. You’ll get best results if you stir the mead during the first third to half of the fermentation. The best way to stir is with a stir-stick, such as The Stainless Steel Mix-Stir, that you can attach to a drill for more effective stirring. Stir slowly for the first couple of seconds, let the mead foam, and then gradually stir a little harder. (You’ll have a mead-volcano if you stir too hard.) Stop when the mead has pretty much finished foaming (usually within 30–90 seconds).
Stirring twice a day is generally sufficient (if you have a fast fermentation, you might want to stir three or four times a day). Stirring does a couple of things: It blows off carbon dioxide, which lowers potential yeast stress, and it adds oxygen to your mead when the yeast can use it best. It also gives you a chance to smell for hydrogen sulfide and check the fermentation progress. Also, when you’re doing staggered nutrient additions, it makes it easy to add your nutrients.
If you add fruit to your primary, you’ll need to break the cap (get the floating fruit wet and back into solution). Fruit on top can dry out and get quite hot from the heat of fermentation moving upward. This can cause nasty hot-fermentation flavors and even molds in your mead.
You’ll also need to control your fermentation temperature, which is as important (if not more so) for mead making as it is for beer brewing. With mead, you generally want to be in the lower third of your yeast’s temperature range. You want to slow down the fermentation a little bit to let the honey shine and reduce fusels and other high-temperature brewing issues. Some wine yeasts have ranges as wide as 50–95°F (10–35°C), so you can start the fermentation in the 50s Fahrenheit (teens Celsius) or low 60s Fahrenheit (high teens Celsius) and ramp up at the end to the mid-60s Fahrenheit (around 20°C).
As in beer brewing, it’s most important to keep the fermentation cool during the growth stages of the yeast. With mead, that’s until about 30–50 percent sugar break (for more information about sugar breaks, see part 2 of the series). If you’re still adding nutrients, keep it cool. After that you can let the temperature rise a little bit to help the yeast finish out.
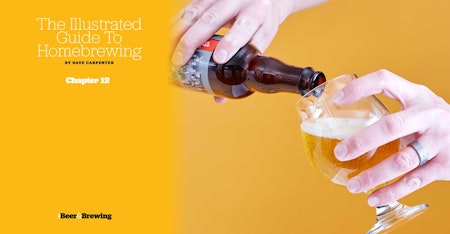
Patience
Once fermentation is done, you’ll want to drink your mead. The biggest difference here between beer and mead is patience. You’re generally making a higher-alcohol beverage, and it takes time. Mead gets smoother and more complex as it ages, so let it. However, you should rack whenever there’s a half inch (1.3 cm) or so of sediment on the bottom. Racking under CO2 if you can is best.
For 10 percent ABV or greater meads, I strongly recommend you wait nine months before considering bottling. If you bottle too early, you miss out on all the goodness of bulk aging and maturation. In addition, fermentation might be incomplete, and you could get inconsistent bottles, leading to bottle bombs. My rule of thumb is to taste every once in a while, taking notes. If the mead really isn’t improving much, then I think about bottling.
If you want to bottle and stuff is still floating in the mead, rack to another carboy and wait at least three more weeks before thinking about bottling again. Otherwise you’ll get chunks of yeast and other sediment in your bottles. This sediment isn’t your friend. At best it muddies the flavors; at worst it adds off-flavors and drastically reduces your aging potential.
To reduce bottle bombs and enhance the color and the longevity of your mead, use sulfite and sorbate when bottling. I prefer corks to bottle caps, as the long-term flavors and aromas tend to be better with corks. After bottling, you’ll want to let the mead sit for a few months. This gives you the advantage of both bulk aging and bottle aging. Stash a part of your batch in a hidden place. You’ll thank me later.
When Things Don’t Turn Out
Unfortunately, sometimes things go wrong. We all know that yeast can be fickle. As in any new endeavor, there’s a little bit of a learning curve, and some things you think are problems aren’t, just unfamiliar flavors or perhaps very young mead.
You can fix or alleviate some mead problems long after fermentation is complete. Maybe adding oak will give the mead structure and complexity; maybe adding a touch of acid will brighten it up; maybe adding a touch of honey or spices will do the trick. The point is, don’t dump your mead if it tastes off; it might be salvageable with some experimentation! Online resources such as gotmead.com can be a great source of helpful tips since odds are that someone else has had the same problem. Or if you have a local mead guru, he or she may be easy to bribe with fermented beverages. Or share your mead with friends—they might be able to articulate the flavor you can’t, then you can search for prevention and remediation. The biggest key to getting help is the notes you take along the way. So take good notes.
Now, get out there and make some awesome meads! You can start with my recipe for Semisweet Traditional Mead or Session Sparkling Dry-Hopped Mead.