
Taste every fruit of every tree in the garden at least once. It is an insult to creation not to experience it fully. Temperance is wickedness.
— Stephen Fry
———
Every child is an artist. The problem is staying an artist when you grow up.
— Pablo Picasso
In all-grain brewing, you prepare wort by mashing malted grain. You forego the convenience of malt extract in exchange for having more influence over your beer. Some might have you believe that all-grain brewing is superior to extract brewing. It’s not. It’s simply another way to prepare wort and fulfill the third of the eight essential steps.
The difference between all-grain brewing and extract brewing is similar to the difference between making your own soup from scratch and reconstituting condensed soup from a can. You end up with soup either way, but making your own gives you more control and tastes fresher. Here are a few reasons to go all-grain.
- You have complete say over wort composition and aren’t limited to the malt extract that manufacturers sell. Most Munich extracts are, for example, made from 50 percent Munich malt and 50 percent pale malt. With all-grain brewing, you can make wort from 100 percent Munich malt if you want.
- You gain access to certain malts that aren’t available as extracts. While extracts of English Maris Otter malt and Vienna malt are now available, the Scottish malt Golden Promise has no extract counterpart nor do some varieties of Munich malt. All-grain brewers can also choose to include adjuncts such as maize, oats, and rice.
- You gain a deeper understanding of beer. When you mash your own grain, you begin to notice subtle changes in wort composition that may not have previously been apparent. You’ll understand enzymes and how minor tweaks to the mash can translate into major differences in the finished product.
- You can brew beer that is very light in color. Extract-based beer is almost always a little darker than beer made fresh from grain. Extract begins life a little dark to begin with and continues to deepen in color as it ages.
All-grain brewing is fun and rewarding, but it’s not for everyone. Here are a few things to consider before you jump in.
- All-grain brewing requires more equipment—not a lot more equipment, but more nonetheless. This may be an issue for those who live in small spaces.
- All-grain brewing requires more time. There’s no getting around this. An experienced brewer who prepares a few things in advance might be able to finish in 4–5 hours, but expect your first all-grain brew day to take 6–8 hours.
- All-grain brewing requires more heat. If you’re already brewing on a propane burner, this won’t be an issue, but if you’re accustomed to boiling 3–4 gallons of concentrated wort on your kitchen stove and topping up with water, you’ll need to procure a heat source that can bring 6–7 gallons of wort to a rolling boil.
- All-grain brewing requires more attention. There are simply more variables to consider when mashing your own grain. When you understand them, you can manipulate them to your advantage, but they also provide more opportunities for unintended consequences.
Even if you plan to stick with extract for the foreseeable future, I encourage you to read this section. You’ll gain a greater understanding of how brewing works, and you’ll be better prepared down the road should you decide to give all-grain methods a try.
Equipment Requirements
The basic equipment required for all-grain brewing includes everything you need for extract brewing, plus a few additional pieces. You can purchase ready-made all-grain equipment from homebrew retailers, or you can build your own. The pieces you need are
- Mash-lauter tun
- Hot-liquor tank
- Heat source
- Wort chiller (if you don’t already have one)
Mash-Lauter Tun
The mash-lauter tun is where all of the action happens. It is here that you combine crushed grain with hot water in a process called mashing. After the starches have been converted to sugars, it is also the scene of lautering, or separating the sweet wort from the spent grain.
In large breweries, the mash tun and lauter tun are separate vessels. Pumping the mash from a dedicated mash tun to a dedicated lauter tun frees up the mash tun for the next batch. At home, however, it’s unlikely that you would ever brew back-to-back in this fashion. Thus, for homebrewers (and many small craft brewers), mashing and lautering take place in the same tun, the cleverly named mash-lauter tun, or MLT.
A mash-lauter tun has just a few requirements:
- It must be physically capable of holding the mash.
- It must be able to maintain a specified temperature for at least an hour.
- It must provide some means of straining sweet wort from the grain.
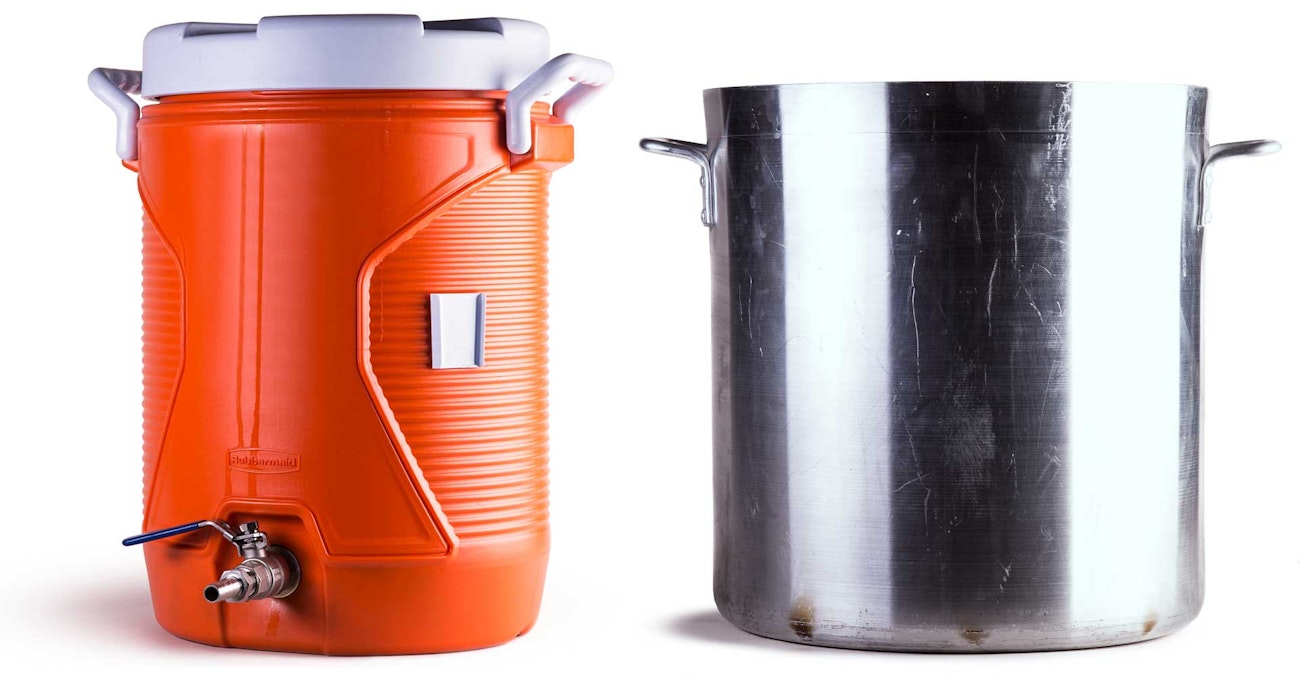
The most affordable MLT option for most hobbyists is to use a plastic beverage cooler (below, left). For 5-gallon (19 l) batches, a cooler of the same size will allow you to comfortably brew beers up to about 1.060 original gravity. Higher gravity means more grain, which means more volume. Thus, 10-gallon (38 l) models are popular as well. An insulated cooler will hold a mixture of crushed grain and hot water within the desired temperature range for at least a couple of hours with only a degree or two of loss.
To separate out the wort, a filtering device is placed in the bottom of the cooler and connected to a ball valve through which wort can flow. There are numerous types of filters, but the false bottom is among the most versatile (above). This is little more than a slightly domed screen that keeps the grain bed just off the bottom of the tun. Wort is removed from below the false bottom and sent out through the valve.
Hot-Liquor Tank
The term hot-liquor tank (HLT) sounds dramatic (who among us couldn’t go for some hot liquor on a cold winter’s night?), but it’s nothing more than a tank that holds hot water. Fancy, eh?
Now to be fair, brewers make a distinction between water and liquor. Water is untreated H2O that comes from the source, while brewing liquor is water that has been treated in some way to make it suitable for brewing. If the water in your area is suitable for mashing, your hot liquor is simply tap water that has been heated.
The HLT is commonly, though not necessarily, the same volume as the mash tun. Many brewers use a second beverage cooler without a false bottom. My HLT is about as simple as it gets: an 8-gallon (30 l) aluminum stockpot (above, right) in which I heat water.
Heat Source
If you’ve been brewing on your kitchen stove, then moving to all-grain brewing may mean investing in a bigger heat source. In all-grain brewing, we collect the entire batch of wort, which for most of us means 5 gallons (19 l) or so. Actually, if you account for evaporation over the course of an hour or more (which you should), then it really means collecting closer to 6.5 gallons (25 l).
Most residential kitchen stoves don’t supply enough heat to bring that much water to a rolling boil in a reasonable amount of time. Some brewers manage by straddling a brew kettle across two burners, but most brewers take the operation outside and use a propane burner or turkey fryer.
Wort Chiller
Some extract brewers never purchase a wort chiller. I never bothered with one until I started brewing all-grain. Even now, when I brew from extract (about a quarter of the time), I boil a concentrated wort on the stovetop and dunk it into an ice bath to cool.
But when you need to drop 5 gallons (19 l) or more of boiling hot wort by 150°F (83°C) in a short amount of time, a dedicated wort chiller is the way to go.
The most commonly used wort chiller is the immersion chiller. It’s a large coil of copper or stainless-steel tubing that is placed in boiling wort for a few minutes to heat sanitize. Then, when the boil is complete, cold water is run through the coil, which pulls heat from the wort and carries it out of the chiller as hot wastewater (which can be collected and used for cleaning). A wort chiller can usually bring 5 gallons (19 l) of wort down to pitching temperature in about 15 minutes.
The All-Grain Process
All-grain brewing really ought to be called all-grain wort preparation because extract and all-grain brewing share all of the eight steps and differ only in the execution of the third step. Thus, everything you know from extract brewing remains valid for all-grain methods. You just need a different Step 3. Here’s how it goes.
1. Grain malts are crushed to expose the inner starches for conversion.
2. Crushed grain is mixed with hot water in the mash-lauter tun and allowed to rest at a single temperature or, in some cases, at a sequence of increasingly warmer temperatures. This process is the mash, and it results in the conversion of starch to sugar.
3. After conversion, the wort is drained from the grain in a process called lautering. But a good deal of sugar remains stuck to the grain, so the grain is rinsed with additional hot water in a process called sparging.
4. The runoff from lautering and sparging is collected in the boil kettle until the desired volume is achieved. Then the boil proceeds as usual.
That’s all there is to it. We’ll cover a few more of the details in Chapters 14 and 15, but that’s all-grain wort preparation in a nutshell.
Partial-Mash Methods
Finally, all-grain doesn’t have to be all or nothing. Partial-mash is an attractive alternative for brewers who want to experiment with grain without fully committing to the full complexity of all-grain methods. Some of the advantages to partial-mash brewing include:
- Minimal equipment needs. You can conduct a small mash in your brew kettle and simply top it up with extract and water before the boil.
- Minimal time commitment. Extracting a small volume of wort from a tiny mash takes a fraction of the time that is needed to collect the full 6.5 gallons (25 l) normally required for a 5-gallon (19 l) batch of all-grain beer.
- Freshness. Mashing even a small amount of grain introduces fresh flavors and aromas that you sometimes can’t achieve with extract and specialty grains alone.
- Access to special malts. A partial-mash brewer can incorporate rye, Munich, Vienna, Golden Promise, and other malts that may be difficult or impossible to obtain as extracts.
- Access to unmalted adjuncts. Grains that aren’t malted lack the enzymes to convert starches to sugars. Flaked oats, for example, won’t contribute much to a stout if they’re just steeped in hot water. But when mashed with enzyme-rich pale malt, oats transform a regular stout into a silky oatmeal stout.
If you’d like to try your hand at partial-mash methods, just use the same principles we discuss in the upcoming chapters to mash a small quantity of grain and continue as you normally would with extract brewing.
Moving On
All-grain wort preparation methods are nothing more than a different means to the same end. If you enjoy brewing and want to get closer to your ingredients and have more control, it may be for you. But if you want to keep things simple, extract always remains a viable approach. Still, understanding some all-grain basics will give you greater insight into the brewing process from grain to glass.
This is an excerpt from our Illustrated Guide to Homebrewing by Dave Carpenter. Want to read the whole thing? Download it here.